
How to Cut Down a Tall Tree Safely and Effectively
- Mike Walker
- 16 hours ago
- 18 min read

Let's be clear about one thing before we even talk about firing up a chainsaw: the most important part of felling a tree happens before you ever make the first cut. A careful, honest safety assessment is what separates a successful project from a disaster.
This initial walk-around is where you prevent accidents, sidestep hefty fines, and set yourself up for a clean, predictable outcome. It's your chance to decide if this is a job you can handle or if it's time to call in the pros.
Your Pre-Felling Safety and Planning Checklist
Successfully bringing down a tall tree is more about strategy and less about brute strength. Overlooking even one small detail can lead to thousands in property damage or serious injury. Think of this checklist not just as a series of suggestions, but as your systematic game plan for spotting and managing risk.
Start with a slow, 360-degree walk around the tree, looking at it from every angle, top to bottom. Does it have a significant lean? Are there big, dead branches—what we call "widow-makers"—just waiting to break loose? Scan the trunk for signs of trouble like fungal growth, deep cracks, or hollow cavities. These are all red flags that the tree's internal structure might be compromised, which makes its fall completely unpredictable.
Assessing the Felling Zone and Potential Hazards
Next up, you need to map out the "felling zone"—the area where you expect the tree to land. A good rule of thumb is to estimate the tree's height and then add a healthy buffer. Once you have a rough idea, get brutally honest about what's in that zone.
Structures: Your house, a shed, the neighbor's fence... these are the obvious ones.
Utilities: Overhead power lines are an absolute no-go for any DIY job. Period. Don't forget about what's underground, either—septic tanks, drain fields, and water lines can be costly surprises.
Landscaping: Are there other prized trees, garden beds, or irrigation systems in the line of fire?
If the felling zone is cluttered with obstacles or just too tight, a simple directional fell is off the table. This is often the crossroads where you have to consider dismantling the tree piece by piece or calling in a team that can handle it safely. Taking the time to learn about mastering your risk register for forestry is a smart move for any landowner wanting to understand professional-grade hazard mitigation.
For a clearer picture, here's a quick-reference table outlining the critical checks.
Initial Tree Felling Safety Checklist
Assessment Area | Key Checks | Go-Ahead Signal | Red Flag (Stop & Call a Pro) |
|---|---|---|---|
Tree Condition | Inspect trunk for decay, cracks, fungus. Check for large dead branches ("widow-makers"). Assess the tree's overall lean. | Tree is healthy, straight, and structurally sound. | Visible rot, deep cracks, significant lean towards a structure, or many dead branches. |
Felling Zone | Measure the tree's height and mark a clear, open drop zone. Identify all obstacles (buildings, fences, other trees). | The landing area is completely clear of all obstacles and has ample buffer space. | The tree could hit a house, shed, fence, or other valuable landscaping. |
Utility Lines | Scan for all overhead power, cable, and phone lines. Confirm locations of underground lines (septic, water). | No utility lines of any kind are within 1.5x the tree's height from the base. | Power lines are anywhere near the felling zone. This is non-negotiable. |
Permits | Check with your local Central Florida city or county office about tree removal ordinances. | You have confirmed no permit is needed, or you have secured the required permit. | You are unsure of the local rules or have been told a permit is required. |
This checklist isn't exhaustive, but it covers the immediate deal-breakers. If you encounter any of the red flags, it's a clear sign that the risk has escalated beyond a standard DIY project.
Understanding Local Permits and Regulations
Don't make the mistake of assuming you can cut down any tree on your property. Many Central Florida counties and municipalities have strict rules, especially for large trees or specific protected species. Firing up the saw without checking can lead to some seriously painful fines.
A quick call to your local planning or building department is all it takes. They’ll tell you if a permit is needed. This isn't just bureaucratic red tape; it’s about protecting the community and managing our local environment responsibly.
Key Takeaway: Any tree showing signs of heavy decay, leaning precariously toward a structure, or sitting anywhere near power lines is not a DIY job. The potential savings are dwarfed by the immense risk.
This reality is reflected in the explosive growth of professional tree services. The industry is projected to hit $39.5 billion in the U.S. by 2025. That boom is driven by landowners, especially here in Central Florida, who understand the dangers of tackling high-risk tree removal. With over 175,000 businesses in the field, there's no shortage of experts to turn to when a job is too big to handle alone.
Once you’ve gone through this assessment, you’ll be able to make a smart, safe decision. You'll either move forward with a solid plan, knowing you've managed the risks, or you'll make the wise call to bring in a professional. For more on timing your project right, check out our guide on Florida's best time to cut down trees for safety and success.
Choosing the Right Takedown Method
Okay, so you’ve done your safety walk-around and decided this is a job you can handle. Now comes the biggest decision of all: how are you actually going to get this tree on the ground?
The method you pick is determined entirely by your property, the tree itself, and any obstacles in the way. We're talking about two main approaches here, and each one is built for a completely different scenario.
Getting this choice wrong isn't just a waste of time—it’s a direct route to putting a hole in your roof or, worse, causing a serious injury. Let's break down the two core techniques: traditional directional felling and the much more intricate sectional dismantling. Knowing the difference is everything.
Directional Felling: The Classic Approach
This is what most people imagine when they think of cutting down a tree. Directional felling is all about making a few precise cuts at the base of the trunk to guide the entire tree to fall in one piece, right where you want it. It's an art and a science, using a face cut (the notch) and a back cut to create a wood "hinge" that steers the tree on its way down.
It’s fast and incredibly effective, but it comes with one absolute, non-negotiable rule: you need space. A lot of it. You must have a wide-open landing zone, completely clear of your house, your neighbor's fence, sheds, power lines, and any other trees you want to keep. It's the perfect method for a large, open lot out in a more rural part of Central Florida where you have zero doubts about where that tree will land.
Directional felling is on the table only when:
You Have Ample Room: The felling zone is at least 1.5 times the height of the tree in every possible direction.
There Are No Obstacles: Absolutely nothing of value is within that drop zone.
The Tree is Predictable: It doesn't have a dangerous lean, rot, or major structural problems that could make it fall erratically.
For instance, if you're taking down a 70-foot pine in the middle of your two-acre property to prep a new homesite, directional felling is your best friend. It’s the quickest way to get the job done. But if that same pine is in a tight suburban backyard, just 30 feet from your house? This method is a definite no-go.
Sectional Dismantling: For Tight Spaces
When you don't have a clear drop zone, you simply can't let the whole tree go at once. This is where sectional dismantling, often called rigging, becomes the only safe play. It’s a highly technical process where a climber goes up the tree and takes it down from the top, piece by manageable piece. This is how the pros handle almost all residential tree removals.
The process is slow and methodical. The climber uses a system of specialized ropes and rigging gear to tie off large limbs or sections of the trunk before cutting them. A ground crew then carefully lowers these massive pieces, preventing them from free-falling and smashing into your roof, fence, or garden.
Key Insight: Sectional dismantling is absolutely not a DIY job. It demands a deep understanding of physics, tree biology, and complex rigging systems, plus a whole suite of specialized safety equipment. The consequences of one small mistake are enormous.
This method is the only option in common situations like these:
The tree is right next to a house, garage, or pool.
It hangs over your neighbor’s property or a public sidewalk.
Power lines or other utilities are running anywhere near the tree's canopy.
Picture a huge, mature oak with branches stretching over your roof and into your neighbor's yard. There's just no clear path for it to fall without causing catastrophic damage. A professional crew would use sectional dismantling to surgically remove that tree, ensuring every single piece lands safely in a tiny, designated spot on the ground. It takes more time and costs more, but it's the only responsible way to handle a tree in a tight spot.
Ultimately, choosing between these two methods boils down to an honest, clear-eyed assessment of your surroundings. If there is even a shadow of a doubt about having enough space for directional felling, the default choice has to be calling a professional who specializes in sectional dismantling.
Gearing Up with Essential Tools and Protective Equipment
Trying to take down a big tree without the right gear is more than just risky—it's an open invitation for a life-altering accident. Your safety, and whether you succeed at all, comes down to having the right Personal Protective Equipment (PPE) and professional-grade tools.
This is absolutely not the place to cut corners. Whatever you spend on proper equipment is a tiny price to pay for your well-being.
Your Non-Negotiable Personal Protective Equipment
Before you even think about yanking the cord on a chainsaw, you need to be geared up from head to toe. Missing even one of these items sends your risk of a serious injury through the roof. This isn't just a friendly suggestion; for anyone serious about cutting down a tall tree, this is the bare minimum.
Your essential PPE checklist should always include:
A Certified Hard Hat: This is to protect your head from falling branches, which old-timers call "widow-makers" for a good reason. They can snap and fall without any warning.
Eye and Face Protection: A full-face shield is best, but at the very least, you need good safety glasses. They're your only defense against wood chips and sawdust flying at you at high velocity.
Hearing Protection: Chainsaws are incredibly loud and can cause permanent hearing damage in just a short amount of time. Earmuffs or high-quality earplugs are mandatory.
Chainsaw-Resistant Chaps: This might be the single most important piece of gear you own. Woven with layers of ballistic fibers, they’re designed to instantly snag and stop the chain on contact, which can be the difference between a close call and a catastrophic leg injury.
Steel-Toed Boots: You need solid boots that give you great ankle support, a reliable grip on uneven ground, and protection from falling logs or the saw itself.
Work Gloves: A tough pair of gloves will improve your grip on your tools and save your hands from getting torn up by splinters and blisters.
I can't stress this enough: never underestimate your gear. The split second a saw kicks back or a branch lets go is the moment you'll thank yourself for not skipping the safety prep.
The Right Tools for a Clean and Controlled Fall
Beyond what you wear, the tools you use have a direct impact on your ability to control where that tree ends up. Using an undersized saw or skipping the felling wedges can turn a straightforward job into an unpredictable mess.
Your basic felling toolkit needs to have:
A Properly Sized Chainsaw: The bar length needs to be longer than the diameter of the tree trunk. This lets you make a clean, single pass for your back cut. For most of the tall trees we see around here, you'll want a saw with at least an 18- to 20-inch bar.
Felling Wedges: These simple plastic or metal wedges are non-negotiable. You tap them into the back cut to keep the saw from getting pinched and, more importantly, to help "push" the tree in the direction you want it to go.
A Sledgehammer or Axe: You'll need something sturdy to drive those felling wedges firmly into the cut.
Ropes or a Come-Along: For trees with a slight but tricky lean, ropes can be used to apply tension and help guide the fall. Just be aware, this is a more advanced technique that has to be set up perfectly to be safe.
The Critical Role of Tool Maintenance
A dull or poorly maintained chainsaw is a dangerous chainsaw. Period.
Before every single use, you need to do a quick maintenance check. Make sure the chain is tensioned correctly—not sagging, but not banjo-string tight—and that it's sharp. A sharp chain cuts cleanly and does the work for you, reducing physical strain and minimizing the chance of a dangerous kickback.
The statistics around tree work are pretty sobering. While new professional equipment, like battery-powered trimmers with anti-vibration tech, is making the job safer for the pros, OSHA still reports over 100 tree-related deaths in the U.S. each year. That number drops way down when professional-grade equipment is used, which really shows the massive safety gap between the DIY approach and professional standards.
It's a huge industry—you can discover more insights about the U.S. tree trimming sector, which supports nearly 300,000 jobs that all depend on this specialized gear.
Executing the Felling Cuts with Precision
Alright, you've done your homework, checked your gear, and now you're standing at the base of the tree. This is where a calm hand and a methodical approach really pay off. Making the right felling cuts is a science, and every move you make is about controlling a massive, heavy object from start to finish.
First things first, clear the deck. Your immediate workspace around the tree's base needs to be completely free of trip hazards. Kick away any loose branches, move any rocks, and clear out any vines that could snag your feet. A clean workspace is a safe workspace.
Once it’s clear, you need to map out at least two escape routes. Think of these as your safety exits. They should be clear paths leading away from the back of the tree's felling direction at a 45-degree angle. Walk them. Know them. The moment that tree starts its journey down, you don't have time to think—you just need to move.
Making the Critical Face Notch
The first cut you'll make is the face notch, sometimes called an undercut. This is the triangular wedge you remove from the trunk, and it’s the single most important factor in telling the tree where to fall. Getting this right is non-negotiable.
The face notch is made up of two distinct cuts that have to meet perfectly.
The Top Cut: Start on the side of the tree facing your target landing zone. Make a downward angled cut, aiming for somewhere between 45-70 degrees.
The Bottom Cut: Below that first cut, make a perfectly flat, horizontal cut. You’ll saw inward until it meets the very end of your top cut, which lets you pull the wedge of wood out cleanly.
The depth of this notch is crucial. You’re aiming for it to penetrate about one-third of the tree’s total diameter. If it’s too shallow, you won’t have enough directional control. Too deep, and you start messing with the structural integrity you need for the hinge.
This simple visual breaks down the process, focusing on the essential gear for each phase of the job.
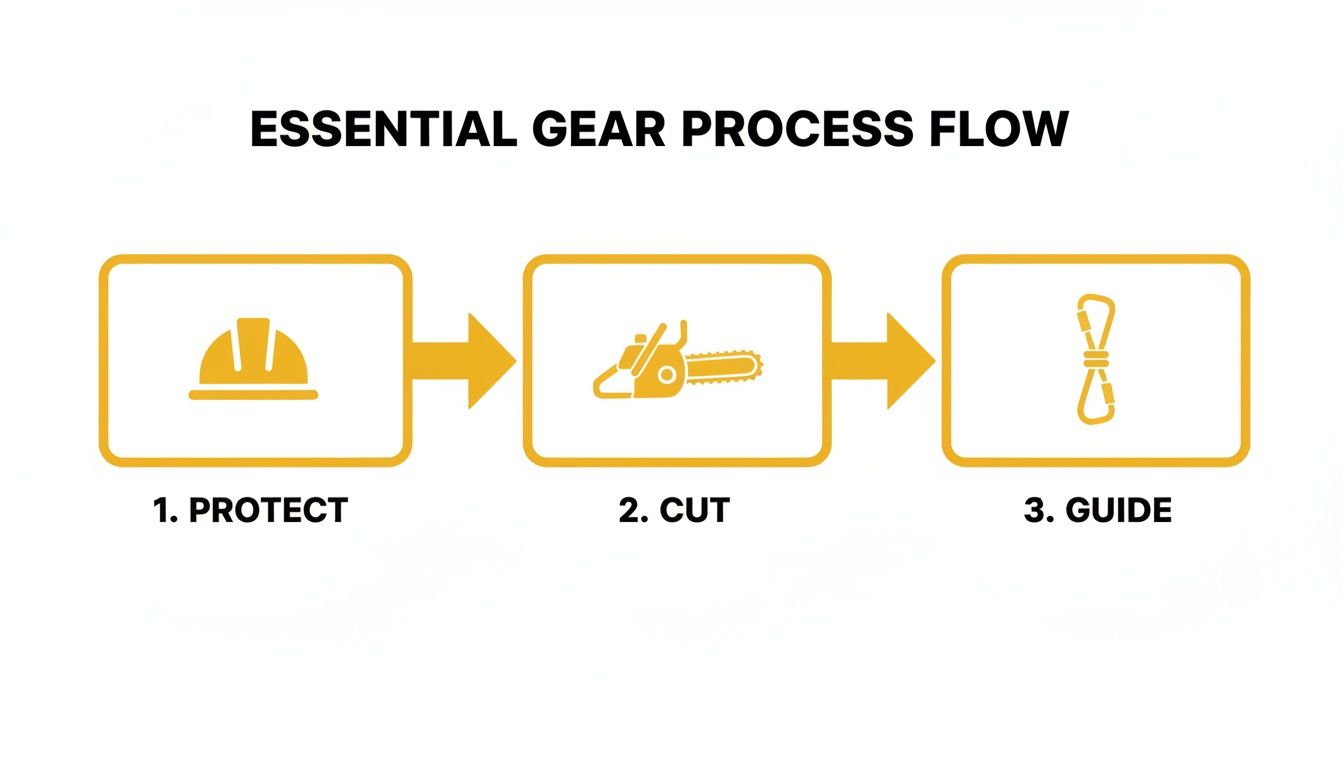
As you can see, the whole operation flows from protection to the final action. Your safety gear, cutting tools, and guidance equipment all have to work together for a controlled, predictable outcome.
Creating the Hinge
That small band of uncut wood left between the back of your notch and where you’ll make the final cut is the hinge. This is your steering wheel. Think of it just like the hinge on a door—it keeps the door connected to the frame and controls exactly how it swings.
Key Takeaway: The hinge is what controls the tree. A proper hinge keeps the tree from twisting, kicking back off the stump, or falling sideways. Its thickness should be about 10% of the tree's diameter.
Keeping that hinge perfectly uniform in thickness is vital. If one side is thicker than the other, the tree will naturally pull toward that thicker side as it falls, sending it off course. If you’ve tackled smaller jobs before, our guide on safely removing tree limbs has some great complementary tips on controlled cutting that apply here, too.
Performing the Final Back Cut
With the face notch cut and your escape routes clear, it’s time for the final commitment: the back cut. This is a single horizontal cut you’ll make on the opposite side of the tree from your notch.
Placement is everything here. You want to make this cut about one to two inches above the horizontal cut of your face notch. This slight elevation creates a step, which is critical for preventing the tree from dangerously sliding backward off the stump as it starts to fall.
Begin sawing straight into the trunk, aiming toward the back of your face notch but leaving that all-important hinge wood intact. Don't cut all the way through! As your saw gets deeper, keep your felling wedges handy.
Once you’ve cut in far enough, turn off the saw and insert one or two wedges into the back cut. Give them a few firm taps with a sledgehammer. These wedges do two critical things for you:
They keep the immense weight of the tree from pinching your chainsaw bar.
They apply gentle pressure to help encourage the tree over in the right direction.
Continue your cut until you have your desired hinge thickness. As you get close, you’ll hear the tree start to groan and feel it shift. This is it. Once it commits to falling, pull your saw out, set it down, and walk—don’t run—down one of your escape routes. Keep your eyes on the tree until you are well clear.
Managing Debris and Removing the Stump
Getting that big tree safely on the ground feels like a huge victory. But believe me, that's only about half the battle. Now you’re staring at a mountain of wood, branches everywhere, and a stubborn stump that refuses to budge. The cleanup phase is often just as demanding as the felling itself.
What you do next dictates how soon you can actually use your newly cleared space. Thinking through your debris and stump strategy before you make that final cut will save you an incredible amount of time, sweat, and money.
Deciding the Stump’s Fate
That leftover stump isn't just an eyesore—it's a tripping hazard and a magnet for pests like termites and ants. You've got a few ways to tackle it, and each comes with its own trade-offs.
Chemical Removers: This is the "set it and forget it" approach, but you'll need patience. You drill holes into the stump, fill them with potassium nitrate granules, and let nature do the work. It can take anywhere from six months to over a year for the wood to get soft enough to chop out with an axe.
Manual Removal: If you're up for a serious workout, you can go after the stump with pure grit. This means digging all around it, hacking through major roots with a mattock or axe, and then using a high-lift jack to pry the whole thing out of the ground. It's incredibly tough work, really only feasible for smaller stumps.
Stump Grinding: For most people, this is the way to go. A professional will bring in a powerful machine that chews the stump and its major roots into a pile of wood chips, usually going 8-12 inches below the surface. You're left with a hole you can fill with topsoil and be ready to plant grass over almost immediately.
If you're weighing the pros and cons, our guide comparing a stump grinder vs. stump removal breaks down the costs and effort involved to help you decide.
Handling the Mountain of Debris
A single tall tree creates a staggering amount of wood and branches. Your first move should always be limbing—methodically cutting all the branches off the main trunk. Once it’s bare, you can start bucking the trunk into manageable sections. Cut them to about 16 inches if you're planning on firewood, or leave them longer if you're thinking about having the wood milled.
Pro Tip: When limbing, always work from the base of the downed tree toward the top. This keeps the trunk stable and prevents it from rolling on you as you remove the weight of the branches.
After you've bucked the trunk, you’re still left with a massive brush pile. How you get rid of it depends on your local rules and what you want to do with the material.
Chipping: Renting a wood chipper is a fantastic option. In just a few hours, you can turn a gigantic brush pile into a small, neat mound of incredibly useful mulch for your garden beds.
Burning: Many parts of Central Florida allow controlled burns for yard waste, but you absolutely have to check local ordinances first. Some counties require a permit, and burns are often restricted during our dry seasons to prevent wildfires.
Hauling: If you just want it all gone, hiring a debris hauling service is the simplest path. They have the equipment to load everything up and dispose of it properly, leaving your property completely clean.
For any property with even a slight slope, don't forget about erosion. That spot where the tree stood is now bare and exposed. Spreading a layer of hay or using the wood chips from the branches as mulch will help hold the soil in place and prevent it from washing out during our classic Florida downpours.
Stump & Debris Removal Options Compared
Choosing the right approach for the aftermath of tree removal depends on your budget, timeline, and how much manual labor you're willing to put in. Here’s a quick comparison to help you weigh your options.
Method | Typical Cost | Labor Effort | Best For |
|---|---|---|---|
DIY Chemical Removal | Low ($20-$50) | Low | Homeowners who are not in a hurry and have a small stump. |
DIY Manual Removal | Low (Tool rental) | Very High | Small stumps and those who enjoy intense physical challenges. |
Stump Grinding | Moderate ($150-$500+) | None | The fastest and most efficient way to reclaim your space for new use. |
Chipping Debris | Moderate (Rental) | Medium | Creating valuable mulch and reducing the volume of a massive brush pile. |
Burning Debris | Low (Permit fees) | Medium | Rural properties where it's permitted and can be done safely. |
Hauling Service | High ($300-$800+) | None | The quickest, most convenient "hands-off" solution for total cleanup. |
Ultimately, planning for the stump and debris is as crucial as planning the felling itself. Factoring these final steps into your project from the start will ensure a smooth process from standing tree to usable land.
Common Questions About Tall Tree Removal
Even with the best-laid plans, taking down a tall tree is a big job that always seems to stir up a few questions. Getting straight answers is the best way to make sure you're making safe, smart decisions for your property. We've fielded a lot of these questions from landowners here in Central Florida, so let's walk through some of the most common ones.
This isn't just about the "how-to" part; it's about drawing a clear line in the sand between a manageable DIY project and a job that absolutely needs a professional's touch.
How Do I Know if a Tree Is Too Big to Cut Down Myself?
A few red flags should immediately tell you that a tree removal job is out of your league. First, look at your chainsaw. If the tree's diameter is wider than the length of your saw's bar, you're going to need advanced cutting techniques that are incredibly risky without professional training.
An even bigger warning sign is where the tree is located. If any part of that tree—from the trunk all the way to the tips of its branches—could possibly hit a structure, power line, or public space, the risk of a miscalculation is just too high. Don't even think about it.
Another major factor is the tree's health. Dead or dying trees are the definition of unpredictable. Their wood is often compromised, which means they can split, twist, or fall in a direction you never intended. Here’s the bottom line: if you have even a shadow of a doubt about your ability to control that tree's fall with 100% certainty, it's too big for you. It's time to call in the pros.
What Are the Biggest Safety Mistakes People Make?
By far, the most common and dangerous mistake is just a lack of preparation. This goes beyond having the right gear. It means failing to clear out a large enough work area around the tree and, crucially, not planning at least two clear escape routes before you even think about starting the saw.
Another critical error we see is using improper cutting techniques. One of the classic, and most dangerous, mistakes is making the final back cut at the wrong height in relation to the face notch. Get this wrong, and you've just lost all directional control. That one little error can cause the tree to kick back violently off the stump or fall sideways into whatever is nearby.
Finally, a couple of other all-too-common mistakes lead to serious accidents:
Forgetting Personal Protective Equipment (PPE): Chainsaw injuries are brutal and almost always preventable. Wearing the right gear, especially chainsaw chaps, is non-negotiable.
Ignoring Mother Nature: A sudden gust of wind is all it takes to turn a perfect cut into a disaster. Misjudging the tree's natural lean is another way people get into trouble fast.
Are There Alternatives to Completely Removing a Tree?
Absolutely. Sometimes, taking the whole tree down isn't the only answer. If your goal is simply to open up a view, get more sunlight, or reduce the hazard of falling limbs, selective pruning by a certified arborist can often do the trick while saving a beautiful, mature tree. A good arborist knows how to assess the tree's structure and remove specific branches to improve its health and appearance.
For folks looking to clear out bigger, overgrown areas without a full-on clear-cut, forestry mulching is a fantastic option. This process uses specialized equipment to grind up smaller trees and underbrush right where they stand, turning them into a healthy layer of mulch. It's an efficient way to manage vegetation, lower your wildfire risk, and improve the land's health, all while leaving your desirable mature trees standing.
Can I Remove a Tree Near a Power Line?
No. Full stop. It is incredibly dangerous and often illegal for an unlicensed person to do any tree work within 10 feet of a power line. Never, ever attempt this yourself.
Your first call should be to your local utility company. They are responsible for managing any vegetation that’s messing with their primary distribution lines. If the problem is with the service line that runs from the pole to your house, you'll need to hire a qualified and insured professional tree service with certified line-clearance arborists on staff. These crews have the specialized training and non-conductive tools needed to work safely in these high-stakes environments.
When the job is too big, too close, or just too complicated, don't take the risk. The expert team at Palm State Clear Cut has the professional equipment and deep experience to handle any tree removal, forestry mulching, or land clearing project in Central Florida safely and efficiently. Ready your property for its next chapter by visiting us at https://palmstateclearcut.com for a free quote.
Comments