Laying down mulch along a fence line is one of those simple projects that makes a huge impact. It instantly creates a crisp, clean border, keeps the weeds at bay, and, maybe most importantly, protects your fence from getting chewed up by the lawnmower or string trimmer. Getting it right, though, starts with a bit of planning before you ever open a bag.
A little forethought is what separates a professional-looking, long-lasting mulch bed from one that looks messy in a month.
Planning Your Fence Line Mulch Project
A great mulch job really begins before you start spreading. Spending a little time upfront on a few key decisions will save you a ton of time, money, and frustration down the road. This is how you set the stage for a fence line that not only looks fantastic but actually works for you year after year.
First things first: you need to pick the right kind of mulch. The material you lay down affects everything from how often you’ll need to top it off to the health of your fence itself.
Here’s a quick breakdown based on fence type:
- For wood fences, I almost always recommend cedar or cypress mulch. They contain natural oils that are great at repelling insects, which is a huge plus for protecting wooden posts from pests like termites.
- For metal or vinyl fences, you have more flexibility. Durable rubber mulch is an awesome low-maintenance choice, and vibrant dyed wood chips can create a really striking color contrast.
This isn’t just a niche homeowner trend, either. The global mulching material market was valued at a whopping US$ 3.93 billion and is expected to more than double by 2034. It’s clear more and more people are catching on to the practical and aesthetic wins that mulch provides. You can dig into more data on the mulching materials market from Fact.MR.
Choosing the Right Mulch for Your Fence Line
With so many options out there, it can be tough to decide. This table breaks down some of the most common choices to help you figure out what’s best for your yard and your goals.
| Mulch Type | Typical Lifespan | Weed Suppression | Best For | Considerations |
|---|---|---|---|---|
| Cypress/Cedar | 2-3 years | Excellent | Wood fences, natural aesthetics, insect repellency. | Can be more expensive; may fade over time. |
| Dyed Wood Chips | 1-2 years | Good | Adding a pop of color (black, red, brown) against vinyl or metal. | Dyes can fade; needs to be replenished more often. |
| Pine Straw | 1 year | Good | Acid-loving plants, sloped areas (interlocks well). | Decomposes quickly; highly flammable when dry. |
| Rubber Mulch | 10+ years | Excellent | Low-maintenance areas, playgrounds, non-plant beds. | High upfront cost; doesn’t add nutrients to the soil. |
Ultimately, the “best” mulch is the one that fits your budget, maintenance tolerance, and the look you’re going for.
Determining Mulch Bed Width
Once you’ve landed on a material, the next question is how wide to make the bed. There’s no single right answer here—it’s all about visual balance and practicality. Most homeowners find a sweet spot somewhere between 12 to 36 inches.
A narrower bed, maybe 12-18 inches, is more subtle. It works great in smaller yards or when you want the fence to be the star of the show. A wider bed, say 24-36 inches, creates a more substantial buffer and gives you plenty of room to add flowers or shrubs later on.
Pro Tip: One of the most practical reasons for a mulch border is to create a “mower strip.” I always tell people to make the mulch bed at least a few inches wider than their mower’s wheels. This simple trick prevents you from accidentally bumping into or scraping up your fence every time you mow.
Calculating Your Mulch Needs
Figuring out exactly how much mulch to buy is crucial. There’s nothing worse than running out mid-project or having a mountain of leftover mulch sitting in your driveway. You’re aiming for a consistent depth of 2 to 3 inches—this is the magic number to smother weeds without suffocating plant roots or trapping too much moisture against the fence posts.
Here’s the simple formula to get it right:
- Measure the total length of your fence line in feet.
- Measure your desired width for the mulch bed, also in feet (so, 18 inches becomes 1.5 feet).
- Multiply Length x Width to get the total square footage.
- Multiply that square footage by the depth you want in feet (for example, 3 inches is 0.25 feet).
- Finally, divide that number by 27. This gives you the total cubic yards you need, which is how bulk mulch is sold.
If you’re just getting started and want to understand the bigger picture, our comprehensive guide to land clearing and mulching is a great resource that covers the entire process from the ground up.
Preparing the Ground for Flawless Results
Any pro will tell you that a great-looking mulch bed is all about the prep work. It’s like painting a wall—if you don’t clean and prime it first, the final product just won’t hold up. Taking the time to properly prepare the ground is what ensures your mulch will look sharp, keep weeds at bay, and stay put all season long.
The first, and maybe the most important, job is clearing out everything that’s currently growing there. I’m talking about every last bit of grass, weeds, and anything else you don’t want, right up to the base of the fence. A simple shovel or spade gets the job done, but if you’re dealing with a long stretch of turf, renting a sod cutter is a game-changer.
Seriously, don’t cut corners here. Any roots left behind are just open invitations for weeds to pop right back through your beautiful new mulch in a few weeks. You’re aiming for a completely clean slate of bare soil.
Creating a Crisp, Defined Edge
Once the area is cleared, it’s time to cut a clean edge. This is the secret sauce for containing your mulch and stopping the lawn from creeping back into your new bed. A sharp, well-defined edge creates a physical barrier that gives the whole project a polished, professional look.
You’ve got a couple of solid options for this:
- Manual Edging: Grab a flat-bladed spade or a half-moon edger and cut a clean trench about 4 to 6 inches deep along the entire border you’ve planned.
- Power Edging: A gas or electric power edger makes this part almost effortless. It carves out a perfectly straight and uniform line in a fraction of the time.
This trench does more than just look good. It creates a channel that physically holds the mulch in place, which is especially helpful on slight slopes or during a heavy downpour. It’s one of those small details that makes a massive difference in how your fence line looks and lasts.
Choosing Your Weed Barrier
With the ground clear and the edge defined, let’s talk long-term weed control. Laying down a barrier before you add the mulch is your best defense against pesky growth later on. This is a non-negotiable step if you want a low-maintenance result.
There are two popular and really effective methods:
- Cardboard: For an eco-friendly and budget-conscious approach, lay down overlapping sheets of plain brown cardboard. It smothers anything underneath, blocks sunlight so new seeds can’t sprout, and eventually decomposes to enrich your soil.
- Landscape Fabric: If you want something more durable, professional-grade landscape fabric is the way to go. It lets water and air through to the soil but physically stops weeds in their tracks. This is my top recommendation for areas with stubborn or invasive weeds.
If you’re up against some really aggressive plants, you might need to take stronger measures first. For anyone wrestling with tough overgrowth, our guide on how to remove invasive plants offers some practical strategies to reclaim your yard before you even think about laying down mulch.
An effective weed barrier is the backbone of a successful mulching project. It’s the unseen hero that saves you hours of weeding down the line. Whether you choose cardboard or fabric, ensure you have 100% coverage with no gaps for sunlight to peek through.
Once you’ve laid down your barrier, use landscape staples to pin it securely in place. This prevents it from shifting around while you’re spreading the mulch. Now your fence line is perfectly prepped and ready for the final, transformative step.
Installing Mulch Like a Pro
With your fence line cleared, edged, and protected, you’re on the home stretch. This is the moment all that prep work pays off, and you get to see the real transformation happen. Spreading the mulch properly is what gives you that clean, professional finish and ensures you get all the benefits from the material.
Whether you’ve got bags from the local garden center or a big pile of bulk mulch dropped in your driveway, the right tools make all the difference. I always rely on a sturdy wheelbarrow for moving mulch without breaking my back, and a good hard rake or pitchfork is perfect for spreading it around.
Here’s a tip: instead of dumping one massive pile and trying to rake it out, drop smaller, more manageable piles along the length of the fence line. It makes getting an even layer so much easier.
This simple infographic really nails the prep process we just covered, which is the absolute foundation for a great-looking mulch bed.
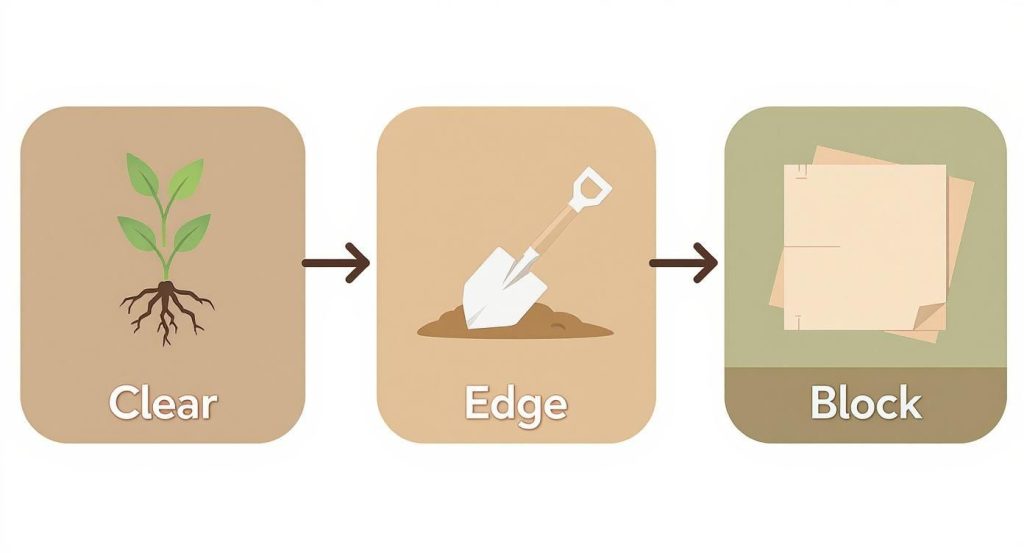
As you can see, the sequence of clearing, edging, and adding a weed barrier is crucial. Following these steps gives your mulch a clean, contained space where it can do its job without being overrun by weeds.
Achieving the Perfect Mulch Depth
One of the most common mistakes I see people make is either putting down way too much mulch or not nearly enough. The sweet spot is a consistent depth of 2 to 3 inches. This is just right for blocking weeds and holding in soil moisture without accidentally suffocating your plants’ roots.
- Less than 2 inches: This layer is just too thin. Sunlight can still get through, which means weed seeds will happily germinate and pop right up through your brand-new mulch.
- More than 4 inches: Go too thick, and you create a dense, heavy mat. This can actually prevent rainwater and oxygen from ever reaching the soil, leading to root rot and other issues.
Think of it as a blanket for your garden bed—you want it thick enough to be cozy, but not so heavy it’s smothering. I find it helpful to use a ruler or even just my hand to check the depth every few feet as I go. It’s a small step that ensures the whole fence line is consistent.
Protecting Your Fence from Moisture Damage
Now for a pro tip that will save your fence. You absolutely must leave a small air gap between the mulch and the base of your fence posts and panels. Piling mulch right up against the fence is a recipe for disaster because it traps moisture.
For a wooden fence, that constant dampness is a fast track to rot and a dinner bell for termites. If you have a metal fence, it creates the perfect conditions for rust and corrosion to take hold right at the base.
It’s an easy fix. Just pull the mulch back about 1 to 2 inches from every post and the bottom edge of the fence. This tiny gap allows for air to circulate, letting the area dry out after it rains and adding years to the life of your fence. It’s a simple detail that makes a huge difference.
Once your mulch is down and you’ve created those air gaps, grab your hard rake for the final touch. Gently smooth out the entire surface, breaking up any clumps and leveling any high or low spots. The goal is a uniform, manicured look. This finishing step is what really elevates your mulch along fence line project from a weekend chore to a professional-grade landscape feature.
Essential Safety and Environmental Tips
Laying mulch can feel like a pretty straightforward job, but it’s worth taking a moment to think through the safety and environmental side of things. A responsible approach means your new fence line won’t just look great, but it will also be safe for your family, your property, and the local ecosystem. It’s all about being proactive.
One of the biggest factors to consider, especially if you live in a dry climate or an area prone to wildfires, is the flammability of organic mulches. Materials like pine straw and finely shredded wood can become incredibly combustible when they dry out. That poses a serious risk if a stray ember ever lands nearby.
Understanding Fire Risk Along Fences
This danger isn’t just a “what if” scenario. Research has shown that a bed of mulch along fence lines can act like a wick, carrying a fire from your yard straight to your home’s structure. It’s a critical safety issue that a lot of homeowners don’t think about when they’re picking out landscaping materials.
A landmark study found that when combustible mulch was placed at the bottom of a fence, fire spread was up to 50% faster than with fences that had no mulch at all. This really drives home how important it is to create a defensible space around your property.
So, what are the safer alternatives?
- Non-combustible options: You can create a beautiful, fire-resistant border with decorative gravel, river rocks, or decomposed granite.
- Compost: Material that’s been well-composted holds much more moisture and is far less likely to ignite than dry, woody mulch.
- A “lean, clean, and green” zone: Fire safety experts recommend keeping a 5-foot non-combustible zone immediately around your house and other structures, and that includes your fence.
Personal Protective Equipment for Mulching
Beyond fire safety, you’ve got to protect yourself during the actual installation. Mulch can be dusty and might contain mold spores, fungi, or splinters you definitely don’t want to breathe in or get in your eyes. Always have the right personal protective equipment (PPE) ready to go.
Here’s what your basic mulching safety kit should look like:
- Sturdy Gloves: Protect your hands from splinters, sharp bits of debris, and general skin irritation.
- Safety Glasses: These are a must for shielding your eyes from flying dust, dirt, and wood fragments when you’re spreading the mulch around.
- Dust Mask: A simple N95 mask is a great idea to keep from inhaling all those fine particles, especially if you’re working with dry, bagged products.
Thinking about the bigger ecological picture is also part of doing this project the right way. The benefits of mulching for sustainable land management are huge—from saving soil moisture to knocking down weeds without chemicals.
However, if you apply it too thick or right before a big storm, you risk nutrient runoff into local waterways. Always stick to a balanced 2-3 inch layer and try to avoid spreading it on days when heavy rain is in the forecast. This kind of thoughtful approach makes sure your project is a win for both your yard and the environment.
Keeping Your Mulch Border Looking Its Best
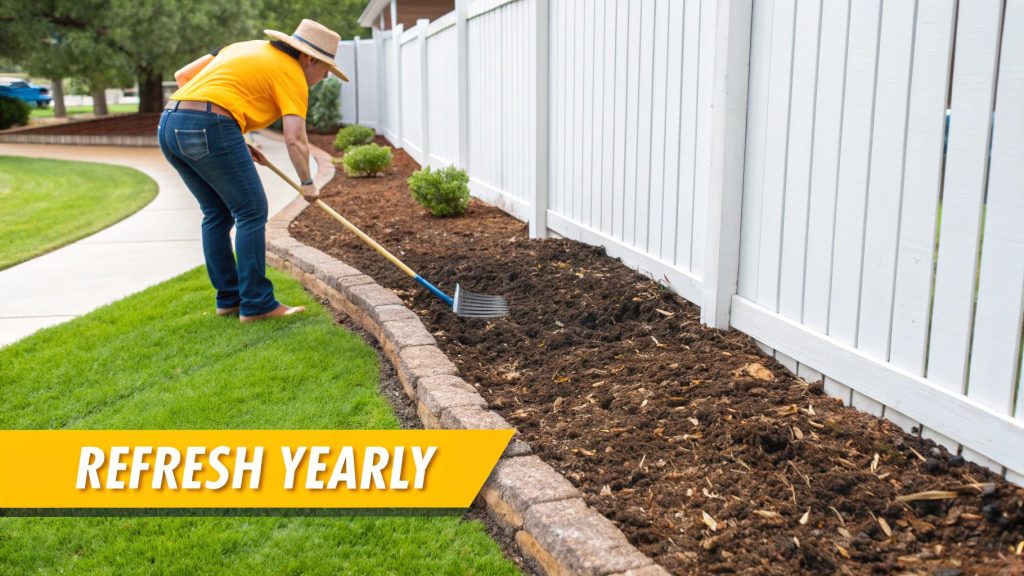
Alright, you’ve put in the work and your mulch is installed. Now what? The good news is, keeping it looking sharp is pretty straightforward. Think of it less like a chore and more like protecting your investment. A little upkeep throughout the year is all it takes to keep that fence line looking clean and professional.
How often you’ll need to refresh your mulch really comes down to what kind you put down. Finer, colored mulches tend to fade and can use a light top-up every year to keep that vibrant color and weed-blocking power. If you went with a chunkier, more natural material like bark or cypress, you can probably get away with a new layer every two or even three years.
It’s also worth noting the real-world impact of a well-kept mulch bed. Beyond just looking good, these simple features can have a big effect. Research shows a proper mulch along fence line can slash weed growth by up to 70%. It also boosts water retention by 30-40%, which is a huge help for any nearby plants and creates unique little microhabitats. To learn more about how landscaping choices can affect local wildlife, check out the insights from Giving Compass.
Troubleshooting Common Mulch Problems
Even with perfect prep, a few little issues can pop up. Knowing what to look for—and how to fix it fast—will keep your mulch border in prime condition.
- Weeds Popping Through: See a few green invaders? Don’t wait. Pull them by hand right away before they have a chance to drop seeds. If weeds keep coming back, it’s a sign your initial mulch layer might be too thin or you have a gap in your weed barrier.
- Compaction: Over time, mulch can get packed down into a dense mat that actually sheds water instead of absorbing it. Once or twice a year, especially after heavy rain or snow, grab a hard rake and gently fluff it up. This breaks up that crust and lets air and water get back to the soil.
- Wash-Out on Slopes: If you get a heavy downpour, you might find some mulch has washed away, especially on sloped ground. Most of the time, you can just rake it back into place. But if it’s a constant problem, you might want to install a subtle stone or metal edge to hold everything where it belongs.
When it’s time for a fresh coat, resist the urge to just dump a thick new layer on top. The best approach is to rake the old mulch to break it up, then add a light 1-inch layer over it. This keeps the total depth from getting much past the 3-4 inch sweet spot, which can end up suffocating plant roots.
Following this simple maintenance plan will ensure your fence line stays looking sharp, keeps weeds at bay, and protects the base of your fence for years.
Common Questions About Mulching Fence Lines
Even a project that seems as simple as laying mulch can throw you a few curveballs. When it comes to mulching a fence line, a handful of issues seem to crop up for just about everyone. Getting these questions sorted out before you start can be the difference between a great-looking, low-maintenance landscape and a project that causes headaches season after season.
Let’s dig into some of the most common questions we get from homeowners.
How Do I Stop Grass From Growing Through the Mulch?
This is, without a doubt, the number one problem most people face. The absolute best defense is a strong offense, and that starts with preparing the ground properly. First, you have to get all the existing grass and weeds out of there—and I mean all of it, roots included.
Once the area is clear, put down a solid weed barrier. If you prefer an organic route, overlapping sheets of plain cardboard work surprisingly well. For a more durable, long-term fix, professional-grade landscape fabric is the way to go. The whole point is to block sunlight so new seeds can’t sprout. After that, lay down your 2-3 inch layer of mulch and be sure to maintain a clean, deep edge between your lawn and the mulch bed to stop those pesky grass runners from sneaking back in.
Can I Put Mulch Directly Against a Wood Fence?
You really want to avoid piling mulch right up against the wood. It’s best practice to leave a small air gap, about 1-2 inches, between the mulch and the base of a wooden fence and its posts.
When you pack mulch directly against the wood, you’re trapping moisture. This creates the perfect breeding ground for rot and decay.
That constant dampness doesn’t just speed up wood rot; it also rolls out the welcome mat for termites and other pests that love moist wood. That little air gap is crucial because it lets the wood breathe and dry out after it rains, which can add years to the life of your fence.
What Is the Best Mulch for a Sloped Fence Line?
On any kind of slope, erosion is your biggest enemy. You need a mulch that’s heavy enough and textured enough to lock together and not wash away in the first big downpour.
For sloped areas, your best bets are materials that will interlock and grip the soil.
- Shredded Hardwood Mulch: Its fibrous, stringy texture is perfect for knitting together and staying put.
- Cypress Bark Mulch: This is another great option. Like hardwood, its shredded form provides fantastic stability on an incline.
Steer clear of lightweight mulches like pine straw or fine wood chips, as they’ll just float away. For some extra insurance, you can even install a subtle border along the downhill edge of the bed to help hold everything in place.
If your fence line project is a bit more involved than just laying mulch—say, you’re dealing with dense brush or stubborn trees—it might be time to bring in the pros. Palm State Clear Cut is a team of experts in land clearing and site prep across Central Florida. Get a free quote today and let us handle the heavy lifting.